
Design Studio Help
Tufting Design Studio — Guide
Turn any photo into a tuft-ready pattern, auto-matched to our 100% New Zealand wool palette. This guide walks through every control so you get a clean, printable pattern and an accurate yarn kit in minutes.
Open the Design Studio →1 Quick start
- Pick your rug size — choose a preset (Square 70 cm, 80×120, 120×180, Square 90) or type your own width and height.
- Drop in an image — click Choose file, drag and drop anywhere on the canvas, take a photo on mobile, or try one of the sample tiles (Bauhaus, Waves, Landscape).
- Crop — the studio opens a crop dialog matched to your rug aspect ratio so the proportions are exactly right.
- Wait for the match — the studio quantizes your image to our wool palette in seconds.
- Compare — drag the green slider on top of the canvas to wipe between Original and Tufted.
- Add the kit to your cart or download the pattern PDF.
2 Header
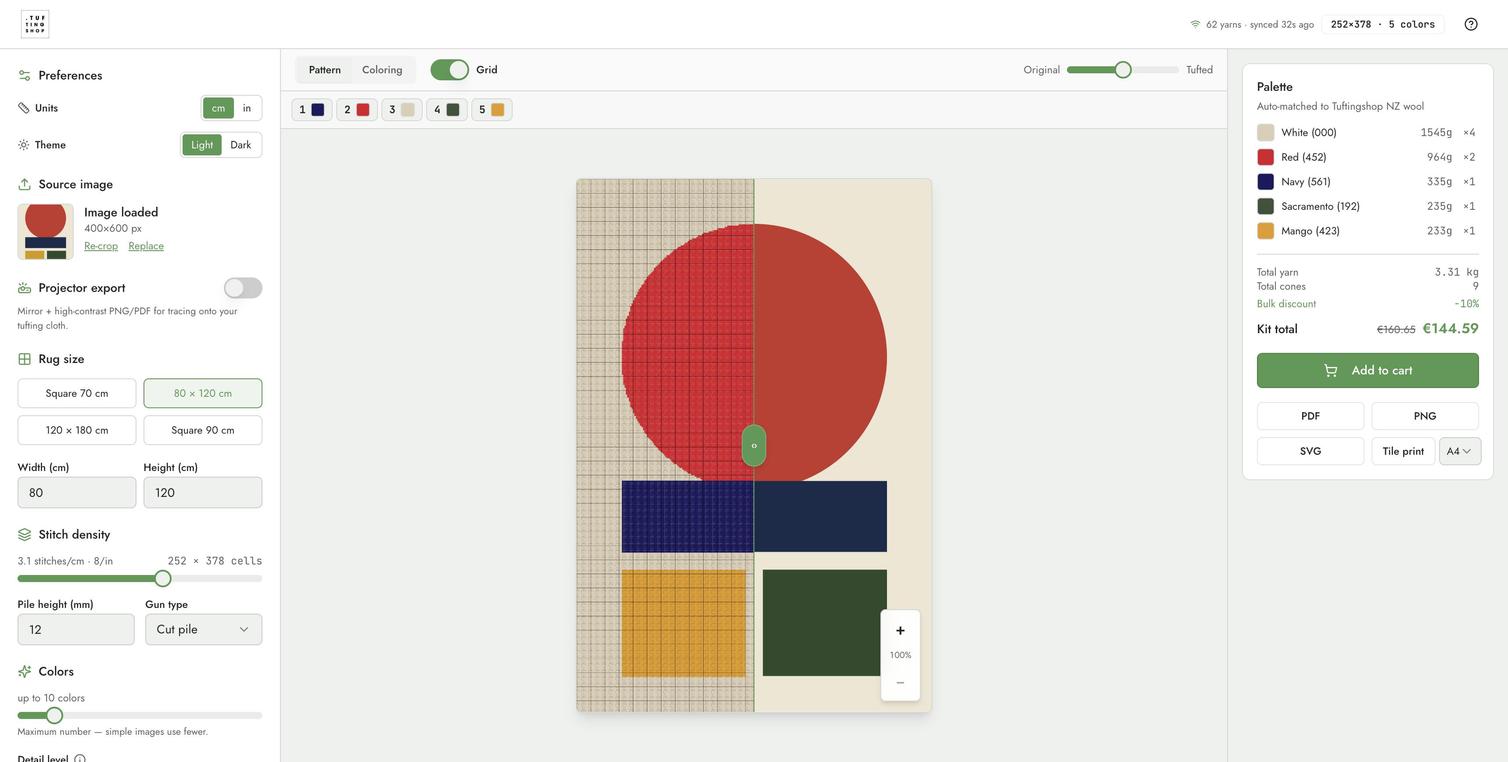
Across the top of the studio you find:
| Element | What it does |
|---|---|
| Tuftingshop logo | Returns to tuftingshop.com. |
Yarn sync badge 62 yarns · synced 32s ago
|
Shows that the wool catalogue was just refreshed from the shop. Auto-fetches on every visit, so prices and stock are always live. |
Grid summary 252×378 · 5 colors
|
Live cell count and number of yarn colors used in the current pattern. |
| Help (?) | Opens this page in a new tab. |
3 Sidebar (left)
The sidebar groups every control from top to bottom in the order you usually need them.
Preferences
-
Units — switch all measurements between
cmandin. Underlying values stay precise; only the display changes. - Theme — Light / Dark toggle. Default is Light, matching tuftingshop.com. Your choice is remembered for the next visit.
Source image
Once an image is loaded you see a thumbnail with two quick actions: Re-crop reopens the crop dialog, Replace swaps in a different photo without losing the rest of your settings.
Projector export
Toggle on to make the PNG and PDF exports mirrored and high-contrast, ready to project onto stretched cloth and trace by hand. The mirror flip means letters and asymmetric shapes come out the right way around when you tuft from the back.
Rug size
Four presets cover the most popular sizes. Type your own dimensions for anything between 20 cm and 300 cm (8" to 118") per side. The crop dialog adapts to the aspect ratio you pick, so a square rug crops square and a 60×90 crops portrait.
Stitch density
Stitches-per-inch (5–10) controls how detailed the pattern is. The live readout shows both metric and imperial (e.g. 3.1 stitches/cm · 8/in) along with the resulting cell grid (e.g. 252 × 378 cells).
- 5 SPI — chunky look, fastest to tuft, fewest cones.
- 8 SPI — balanced default, works for most images.
- 10 SPI — photo-like detail, slower to tuft, more cones.
Pile height (4–30 mm) and Gun type (cut / loop) feed into the yarn-weight estimator. Cut pile uses more yarn than loop pile at the same height.
Colors
- up to N colors (3–20) — a cap, not a target. Simple images use fewer.
- Detail level — slide toward Simpler for fewer color switches and a cheaper kit, or toward More detail to keep small regions intact.
- Confetti cleanup — merges tiny stray cells into their neighbour. Off by default. Bump it up if your pattern looks speckled.
Yarn estimate
Waste buffer (0–30%) adds extra yarn on top of the calculated requirement to cover trimming, threading, and mistakes. We default to 15%. Increase it for first-time tufters or detailed patterns.
4 Canvas tabs
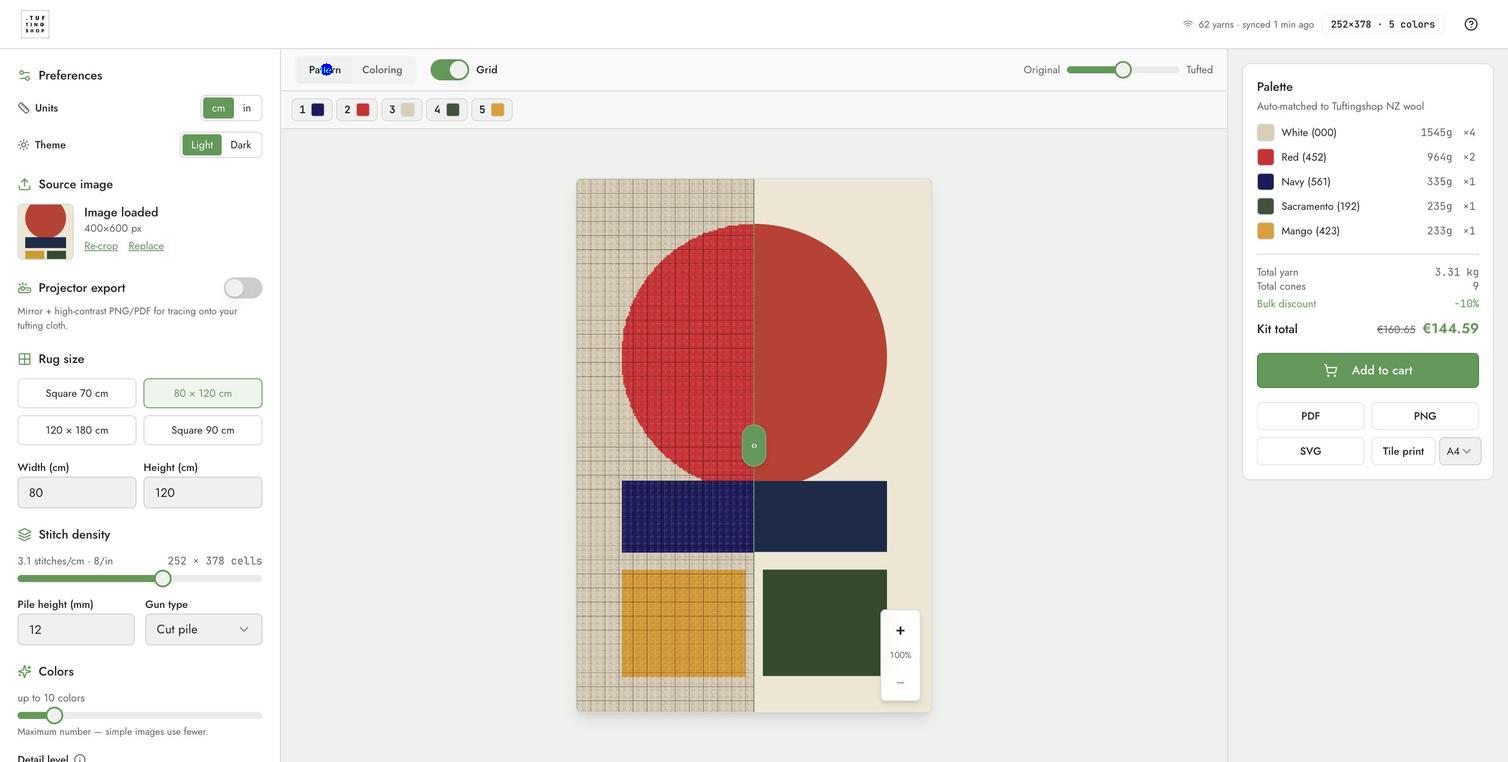
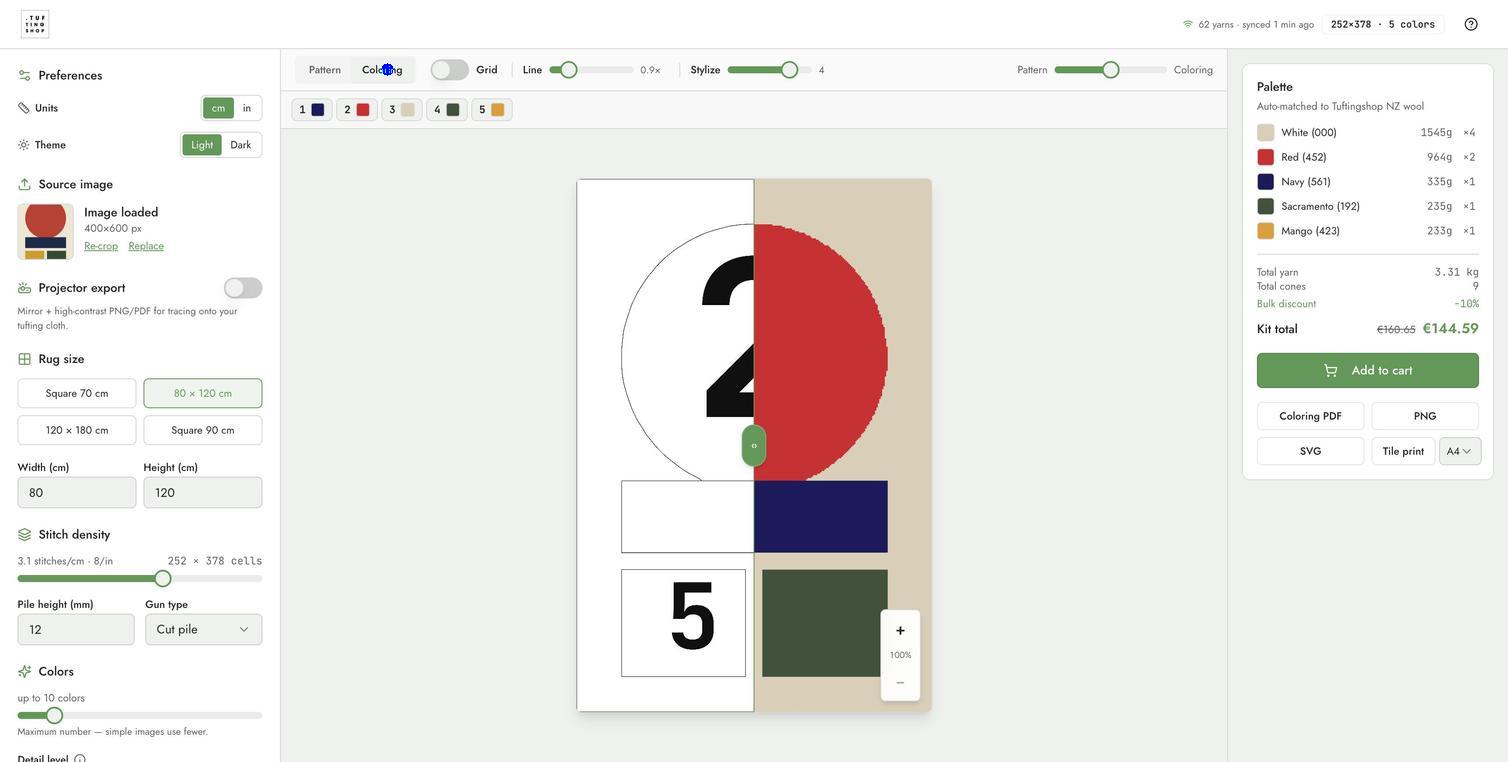
The bar above the canvas switches between two render modes plus a grid overlay:
| Tab | What it shows |
|---|---|
| Pattern | Smooth color-block render of how the finished tufted rug will look. The default view. |
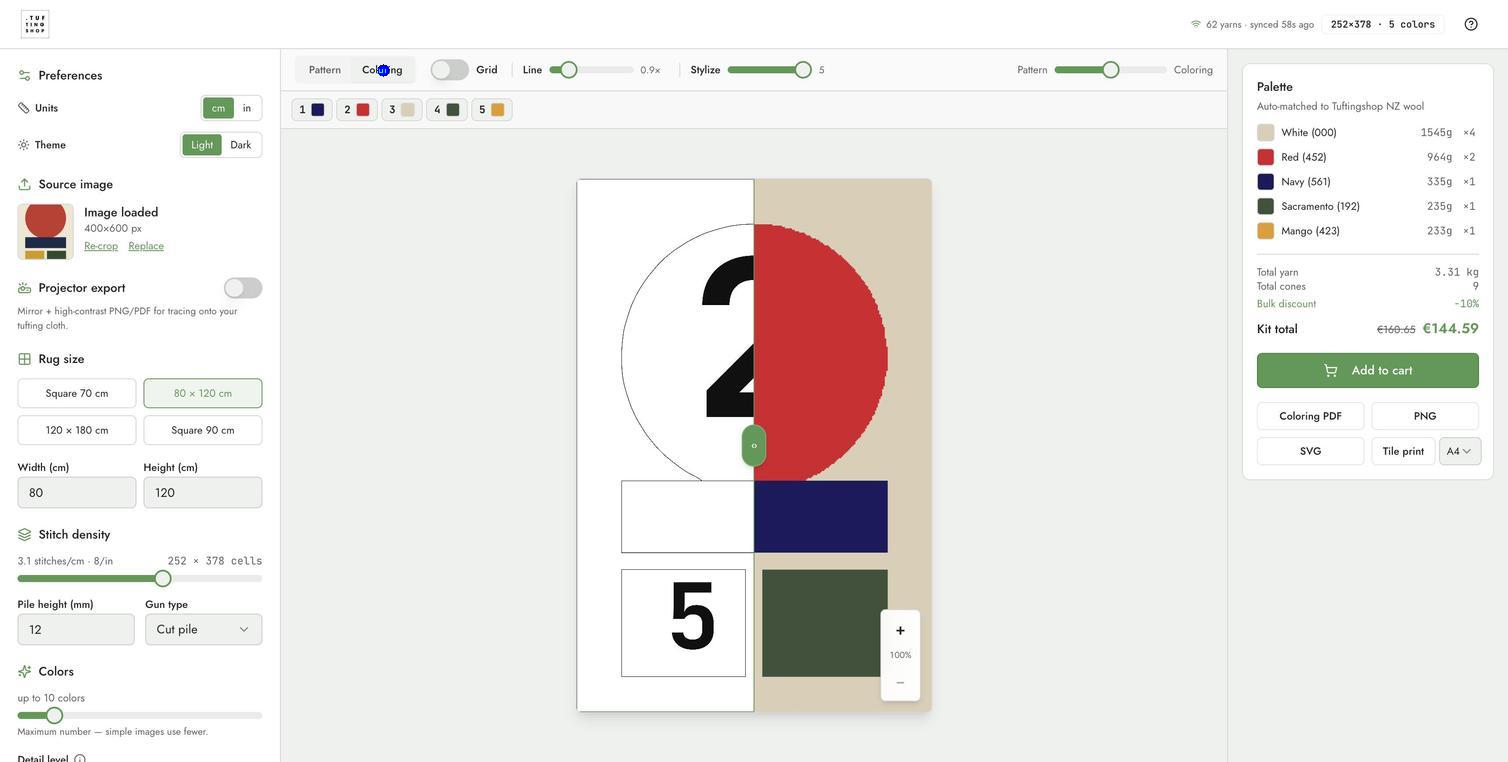
| Coloring | Paint-by-numbers view: every region is numbered with its yarn ID, used as the printable PDF chart. |
| Grid | Overlay switch — turns the 1-cell mesh on or off. Useful for counting stitches when you tuft. |
Coloring controls
When the Coloring tab is active, two extra sliders appear in the canvas toolbar:
- Line (0.5×–4×) — thickness of the boundary lines between regions. Lower = subtle outlines, higher = bold cartoon-style lines.
-
Stylize (0–5) — smooths the region outlines.
0keeps every pixel-stair;5rounds corners aggressively while preserving sharp angles. Great for turning photo regions into clean, printable shapes.
5 Compare slider
Above the canvas, drag the green ‹› handle (or use arrow keys) to wipe between your Original photo on the left and the Tufted result on the right. Works the same on desktop and mobile.
6 Zoom & pan
- Mouse / trackpad: scroll to zoom (1× to 8×), click-and-drag to pan when zoomed in.
- Touch: pinch to zoom, one-finger drag to pan.
- Reset: the small reset icon snaps back to fit-to-screen.
7 Palette & kit (right panel)
- Each yarn used appears with its swatch, name, color code, total grams, and the number of cones rounded up.
- Below the palette, the totals show Total yarn, Total cones, applied Bulk discount, and Kit total — both the original and discounted price.
-
Bulk discount tiers apply automatically, matching the discounts on tuftingshop.com:
- 5+ cones → 10% off
- 10+ cones → 20% off
- 25+ cones → 30% off
- Add to cart drops every cone in the right quantity straight into your tuftingshop.com cart.
8 Exports
| Format | What you get |
|---|---|
| PDF (or Coloring PDF when on the Coloring tab) | Cover page with the Tuftingshop logo, full-color preview, paint-by-numbers chart fitted to one page, and a yarn key with cone counts. JPEG-compressed under 1 MB. |
| PNG | One sharp image of the current view. Great for sharing or projecting. |
| SVG | Scalable vector export of the current view. Ideal for editing in Illustrator/Affinity or for laser-cutting stencils. |
| Tile print | Splits the pattern across multiple paper sheets at 1:1 scale. Tape the sheets together for a full-size template. |
| Paper size (A4 / Letter / A3) | Dropdown next to the export buttons. Affects PDF and Tile print. |
| Projector PNG / PDF | When the Projector export toggle is on, the PNG and PDF are mirrored horizontally and pushed to high contrast for clean projection onto cloth. |
9 Tips for the best result
- High-contrast images quantize best. Posters, illustrations, and graphic photos beat low-contrast snapshots.
- Crop tight. Use the crop dialog to remove background clutter — the studio matches the entire frame, not just the focal subject.
- Cap colors at 8–12 for cleaner tufting. 20 colors look great on screen but mean 20 cone changes per row.
- Bump Confetti cleanup if your pattern looks speckled — it merges tiny single-cell islands into their neighbour.
- Try Stylize 2–4 on photos. Smoother region outlines mean a much faster, less fiddly tufting session.
- Density vs. size: a 120×180 cm rug at 10 SPI is 1.4 million stitches. The studio shows a warning when the grid gets very large.
10 Mobile use
The studio works on phones and tablets. The sidebar collapses behind a Controls button. Compare slider, zoom, and tabs all stay reachable on the canvas. Both PNG and PDF exports save directly to your phone.
11 Troubleshooting
| Problem | Fix |
|---|---|
| Image won't upload | JPEG, PNG, and WebP under ~15 MB. Very large photos may stall — resize to 2000×2000 px first. |
| Pattern looks washed out | Increase the colors slider or lower Confetti cleanup. The wool palette is fixed — if your image needs colors we don't carry, the closest match is used. |
| Outlines look jagged | Bump Stylize to 2–4 on the Coloring tab. |
| Yarn estimate seems off | Check pile height and gun type — cut pile uses more yarn than loop pile at the same height. Waste buffer also influences the total. |
| Pattern PDF too big to print | Switch the paper size to A3 or use Tile print to spread the chart across multiple sheets at 1:1. |
| Cart is missing items | Make sure cookies and third-party storage aren't blocked for tuftingshop.com. |
Need more help? Email info@tuftingshop.com with a screenshot of your design and your rug size, and we'll help you get the best result. Want a tutorial first? Visit the Tufting Academy for setup guides and technique videos.