
Wool Carpet Care Guide: Cleaning Tips & Complete Stain Removal Chart

Wool Carpet Care Guide: Cleaning Tips & Complete Stain Removal Chart

Wool Carpet Care Guide: Cleaning Tips & Complete Stain Removal Chart

Creator: Wools of New Zealand (Wools of NZ)  | 

Wool carpets and tufted wool rugs are naturally beautiful, luxuriously soft, and built to last. This guide covers everything you need to keep them looking their best—from smart vacuuming habits and fast spill action to a complete, easy-to-use stain removal chart.

Shedding: What’s Normal

All wool carpets shed, especially high pile weight, staple, or spun yarn styles. Shedding is simply the release of short, excess fibers due to friction and foot traffic—it does not affect the structural integrity of your carpet. Expect the effect to lessen and typically stop within 3–4 months, depending on traffic and vacuum frequency.

During the shedding period, occasional use of an adjustable revolving power/turbo vacuum head can help your carpet look its best—just make sure the brush does not touch the pile.

How to Vacuum Wool Carpets

  • Weekly clean: Do a complete vacuum once per week to remove dust and prevent soil from embedding.
  • High-traffic areas: Vacuum more often, especially during the initial shedding period.
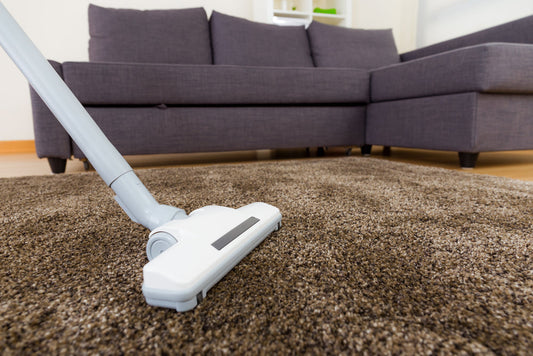
  • Use suction only: For regular care on both cut pile and loop pile, use a static foot suction vacuum.
  • Go slow: Give the vacuum time to work thoroughly.

Spills & Spot Cleaning (Step-by-Step)

Speed is everything. Wool naturally resists many spills, but quick action gives the best results.

Liquid Spills

  1. Blot (don’t rub) with an absorbent white cloth until dry.
  2. If available, use an extraction spot cleaner. Work from the outside in.
  3. After treatment, blot as dry as possible, then cover with paper towels to avoid watermarks.

Solids

  1. Use a spoon to gently lift away as much as possible.
  2. Treat any residue using the instructions in the stain removal chart below.

DIY Detergent Solution (Wool-Safe)

Listed as Treatment B in the chart.

  • 1 teaspoon clear dishwashing liquid (no bleach or strong alkali) or detergent powder
  • 1 teaspoon white vinegar
  • 1 litre lukewarm water

Apply to the stain, then rinse thoroughly with fresh water to remove all detergent. Blot dry.

What Not to Do

  • Avoid stain repellents containing silicone or bleach; they can accelerate soiling and void warranties.
  • Always pre-test any cleaner in an inconspicuous area to confirm colourfastness.
  • Ensure good ventilation when using solvent-based cleaners.

Wool Carpet Stain Removal Chart (A–J)

Tip: Print or bookmark this section for quick reference. Print chart

Order of Treatment — apply Step 1, then Step 2, then Step 3 as needed
Offending Substance Step 1 Step 2 Step 3
Alcoholic Drinks A B –
Beetroot A B –
Bleach A B –
Blood C B –
Butter D D –
Chewing Gum D C –
Chocolate B C –
Coffee A B C
Cooking Oil C B –
Cream B C –
Egg B – –
Faecal matter B J –
Floor Wax C B –
Fruit Juice A B –
Furniture Polish C B –
Gravy / Sauce E B C
Ink — Ballpoint C G B
Ink — Fountain Pen A B C
Ink — Felt Tip E B F
Lipstick C B –
Milk E C B
Mustard B – –
Nail Polish F C A
Oil C B –
Paint — Latex A B C
Paint — Oil based I C B
Rust C B H
Salad Dressing B C –
Shoe Polish C B –
Soft Drink A B –
Urine* A B J
Vomit B – –
Wine I A B
Tea A B C
Tar C – –

Key to Treatments

  • A: Blot with cold water
  • B: Apply detergent solution (see above)
  • C: Mineral spirits or turpentine
  • D: Chill with ice/freezing spray, then pick/scrape off
  • E: Blot with warm water
  • F: Clear nail polish remover (preferably acetone)
  • G: Isopropyl alcohol
  • H: Rust remover
  • I: Absorbent powder (e.g., salt or talcum)
  • J: Dry compound cleaner

*For pet accidents and similar organic spills, act immediately for best results.

FAQ

Do wool carpets always shed?

Some initial shedding is normal and usually subsides within 3–4 months with routine vacuuming.

How often should I vacuum a wool carpet?

Vacuum thoroughly once per week, and more often in high-traffic areas or during the shedding period.

Is bleach safe for wool carpet?

No. Avoid products containing bleach or silicone—they can cause accelerated soiling and may void warranties.

What’s the best first step for any spill?

Blot immediately with a white absorbent cloth—never rub—and then follow the chart above.

Created by Wools of New Zealand (Wools of NZ). Published on TuftingShop for educational purposes with attribution.

Back to blog

Guides

What is Tufting

Tufting is the craft of making rugs by hand using a tufting gun to push yarn through a backing cloth. A loop holds the yarn in place; for cut pile rugs, blades trim the loops for a plush finish. The pile height can be adjusted by cutting the yarn sooner or later as it passes through the cloth.

Tufting is a zero-waste technique—rugs are created directly in their final shape. It’s perfect for designers, artists, and hobbyists looking to make unique wall hangings, rugs, or even fashion pieces.

Creative Possibilities

In your designs, you can experiment with shapes, colors, pile types (cut or loop), and pile heights. To get started, you’ll need at least:

Find inspiration and techniques from our guides or explore the many talented tufting artists online.

A Guide to a tufting setup

Tufting frame

A good and stable tufting frame is essential when starting a new tufting project.

Make sure your frame is stable enough because you will be adding quite some pressure to it when tufting. You can find a complete self assembly frame on our webshop.

Stretching the cloth

Your cloth needs to be well stretched on the frame, again to provide a stable tufting surface so you can tuft the rug yarn consistently.

 Carpet grippers on your frame are perfect when strechting your cloth. The nails on the grippers go through the cloth and keep it in place so you can stretch it very tightly. Other options are nailing or stapling the cloth to your frame.

The carpet grippers can be reused for every project and let you re-stretch the cloth during your project.

 Yarn feeding

 Make sure that you “feed” the yarn from above the tufting frame. This way you make sure that it is fed consistently and the yarn does not get in the way.

Consistent feeding is key to when you do not wish to rewire your gun all the time. Cones of yarn therefore often work better then balls because the yarn is more likely to give resistance.

A Guide to tufting guns

Not sure which tufting gun to choose? Whether you're making your first rug or experimenting with different textures, understanding the different types of tufting guns will help you find the right machine for your project.

The two main differences between tufting guns are:

  • Pile height: How long or fluffy your rug's surface will be.
  • Cut pile vs loop pile: Whether the yarn is cut or left in loops.

Other factors worth considering include tufting speed, machine weight, ease of use and build quality.

Tufting Gun Pile Height: How High Can You Go?

Pile height determines how thick, fluffy or textured your finished rug will look and feel.

Standard electric tufting guns typically produce pile heights of around 5–21 mm, making them ideal for rugs, wall hangings and other textile projects.

Want a more dramatic, shaggy finish? High-pile electric tufting guns can create much longer piles, including 20–30 mm and 35–45 mm options. For even taller piles, pneumatic tufting guns can reach heights of up to 60 mm, although they require an air compressor.

Cut Pile vs Loop Pile Tufting Guns

One of the most important choices when buying a tufting gun is deciding between cut pile and loop pile. Both techniques create a different texture and finish.

Cut Pile Tufting Guns

A cut pile tufting gun uses built-in scissors to cut the yarn as it passes through the backing fabric. This creates a soft, fluffy surface that can be trimmed and carved for a smooth, detailed finish.

Cut pile is a popular choice for beginners and works especially well for decorative rugs, colorful designs and wall art.

Loop Pile Tufting Guns

A loop pile tufting gun leaves the yarn in continuous loops instead of cutting it. The result is a more structured, textured surface with a distinctive handmade appearance.

Loop pile is ideal for creating patterns with visible texture and a more defined surface. If you want to turn the loops into cut pile, you'll need to cut them separately.

Cut and Loop Tufting Guns

Can't decide between the two? A cut and loop tufting gun offers both techniques in one machine.

Already have a tufting gun?

For yarn slipping out, uneven stitches or cloth tearing, use our tufting troubleshooting guide to check your setup before adjusting or replacing your machine.

A guide to Yarn

What yarn should I use for tufting?

This depends on what you are making. Although most yarns “work” they will definitely give different effects. In many cases you will find a mix of different materials. The following table describes the qualities of different materials.


Pros

Cons

Acrylic yarn


Cheap, synthetic and soft. Great for wall pieces.

Does not hold its structure and therefore not great for durable floor pieces.

Cotton yarn

Moderately soft, has a medium hold. Although more expensive then acrylic, is easy to find in many colors, at a good price

Not “indestructible”, fibers are soft and can collapse.

Wool yarn

Holds shape really well and has a natural dirt-resistance.

Most expensive option


In general go for a material that is not too soft because it will not hold shape.

How thick should my yarn be?

You can make the yarn as thick as you want as long as it fits through the needle of your tufting gun. A well-loaded gun (not to thin) will help you get more consistent results. Stuff the needle with as many strands as will fit.

You can find yarns here.